You are viewing the article Instructions for 2 ways to create Gif images on computers and laptops quickly and simply at Lassho.edu.vn you can quickly access the necessary information in the table of contents of the article below.
Unique Gif photos on social networking sites are no longer strange to everyone. But do you know how to create unique Gif photos on your computer or laptop? Learn how to quickly create Gif images with Photoshop and Giphy below.
Create Gif images with Photoshop application
Step 1. Import a series of still images:
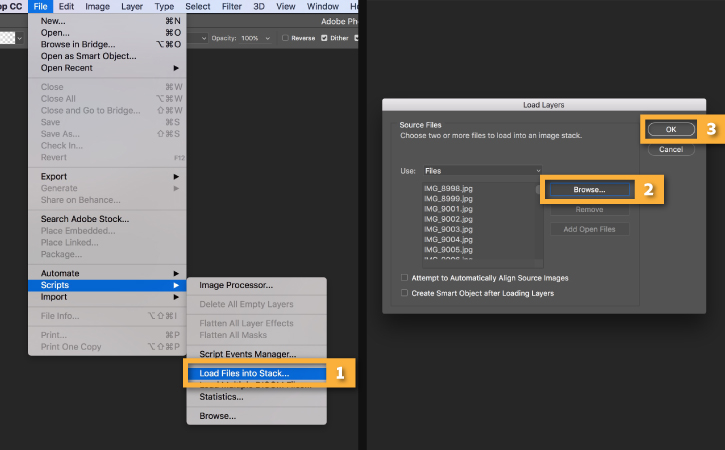
Open the Photoshop application, click File > Scripts > Load File Into Stack.
Click Browse and upload the photos you plan to use. While holding down the Shift key, select all the necessary files and press Open.
Click OK to import the image into a separate file with only one layer.
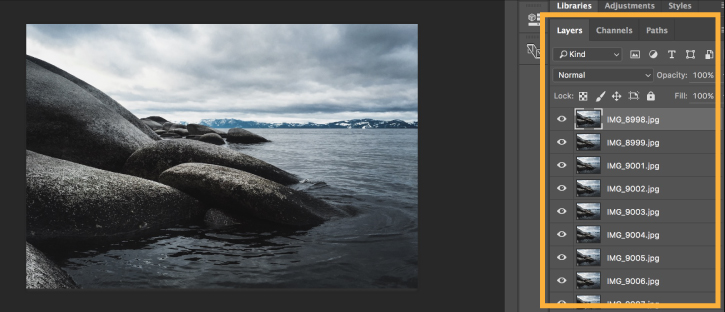
Notice the number of new layers created on the layers panel on the right side of the interface. These single layers can become the framework for the animated GIF you want to create.
Alternative: Import a short video.
If you start with a short video, first you need to convert the video format into single layers. Go to File > Import > Video Frames to Layers.
Select the file you want to use and click Open.
Click OK to convert the video frames into separate layers.
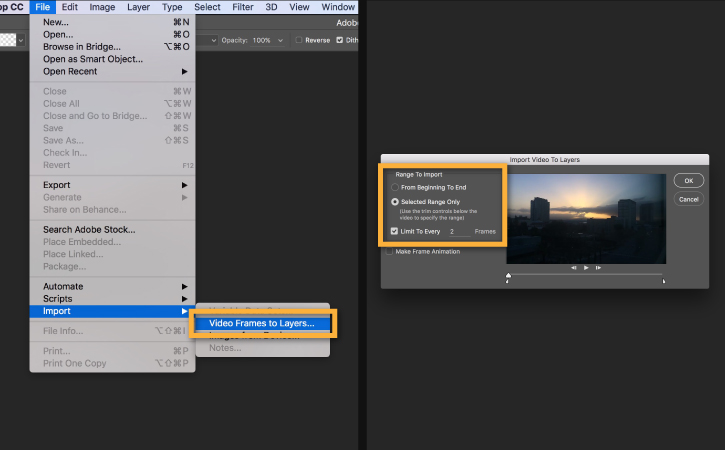
Note: Photoshop does not have a conversion feature for very long videos. You need to use the selections in the Import window to limit the number of frames to be imported. You can choose to import the entire video or just a segment of it. You can also limit the number of frames to be imported to set the interval, for example one every 2 frames will be imported.
Step 2. Open Timeline:
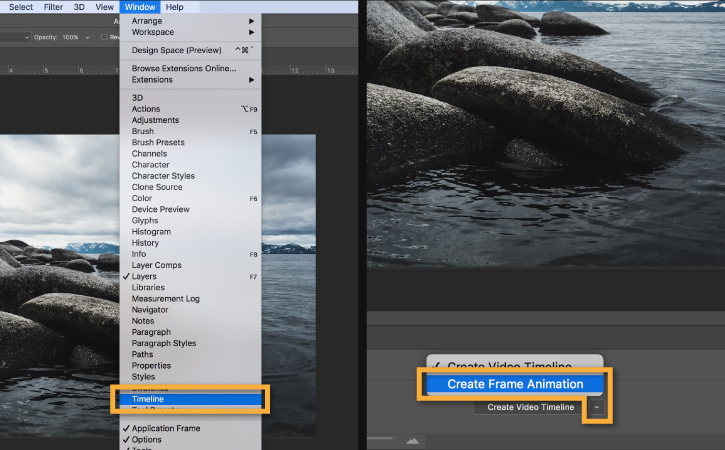
Go to Window > Timeline to open the Timeline panel.
Click the arrow on the button in the center of the panel and choose Create Frame Animation. Then press the button to create the next new frame.
Step 3. Convert the layer to an animation frame:
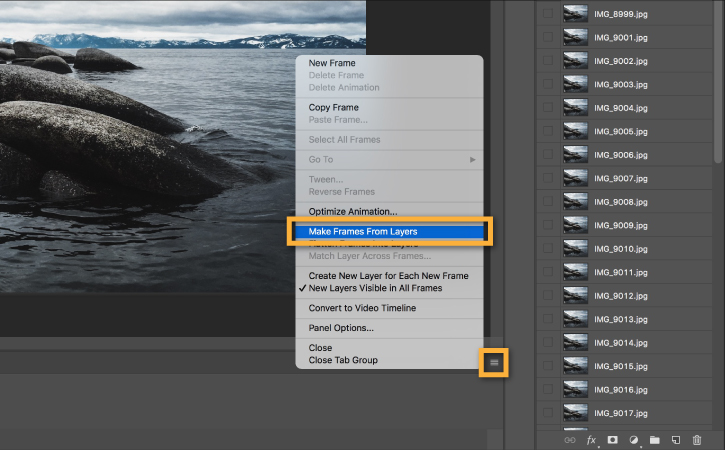
Click the menu icon in the upper right corner of the Timetable panel. Click Frames From Layers. This will convert all layers in the layers panel into individual frames in your animation.
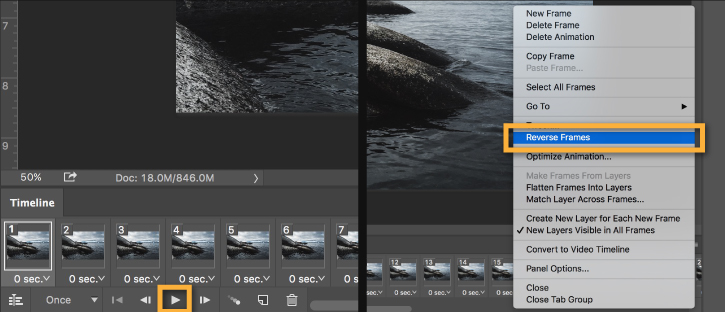
Click the Play button at the bottom of the Timeline panel (or hold the Spacebar button on your computer keyboard) to preview the animation.
Note: If your animations are showing up in reverse order, click the Timeline icon again and press Reverse Frames.
Step 4. Set up repeat animation:
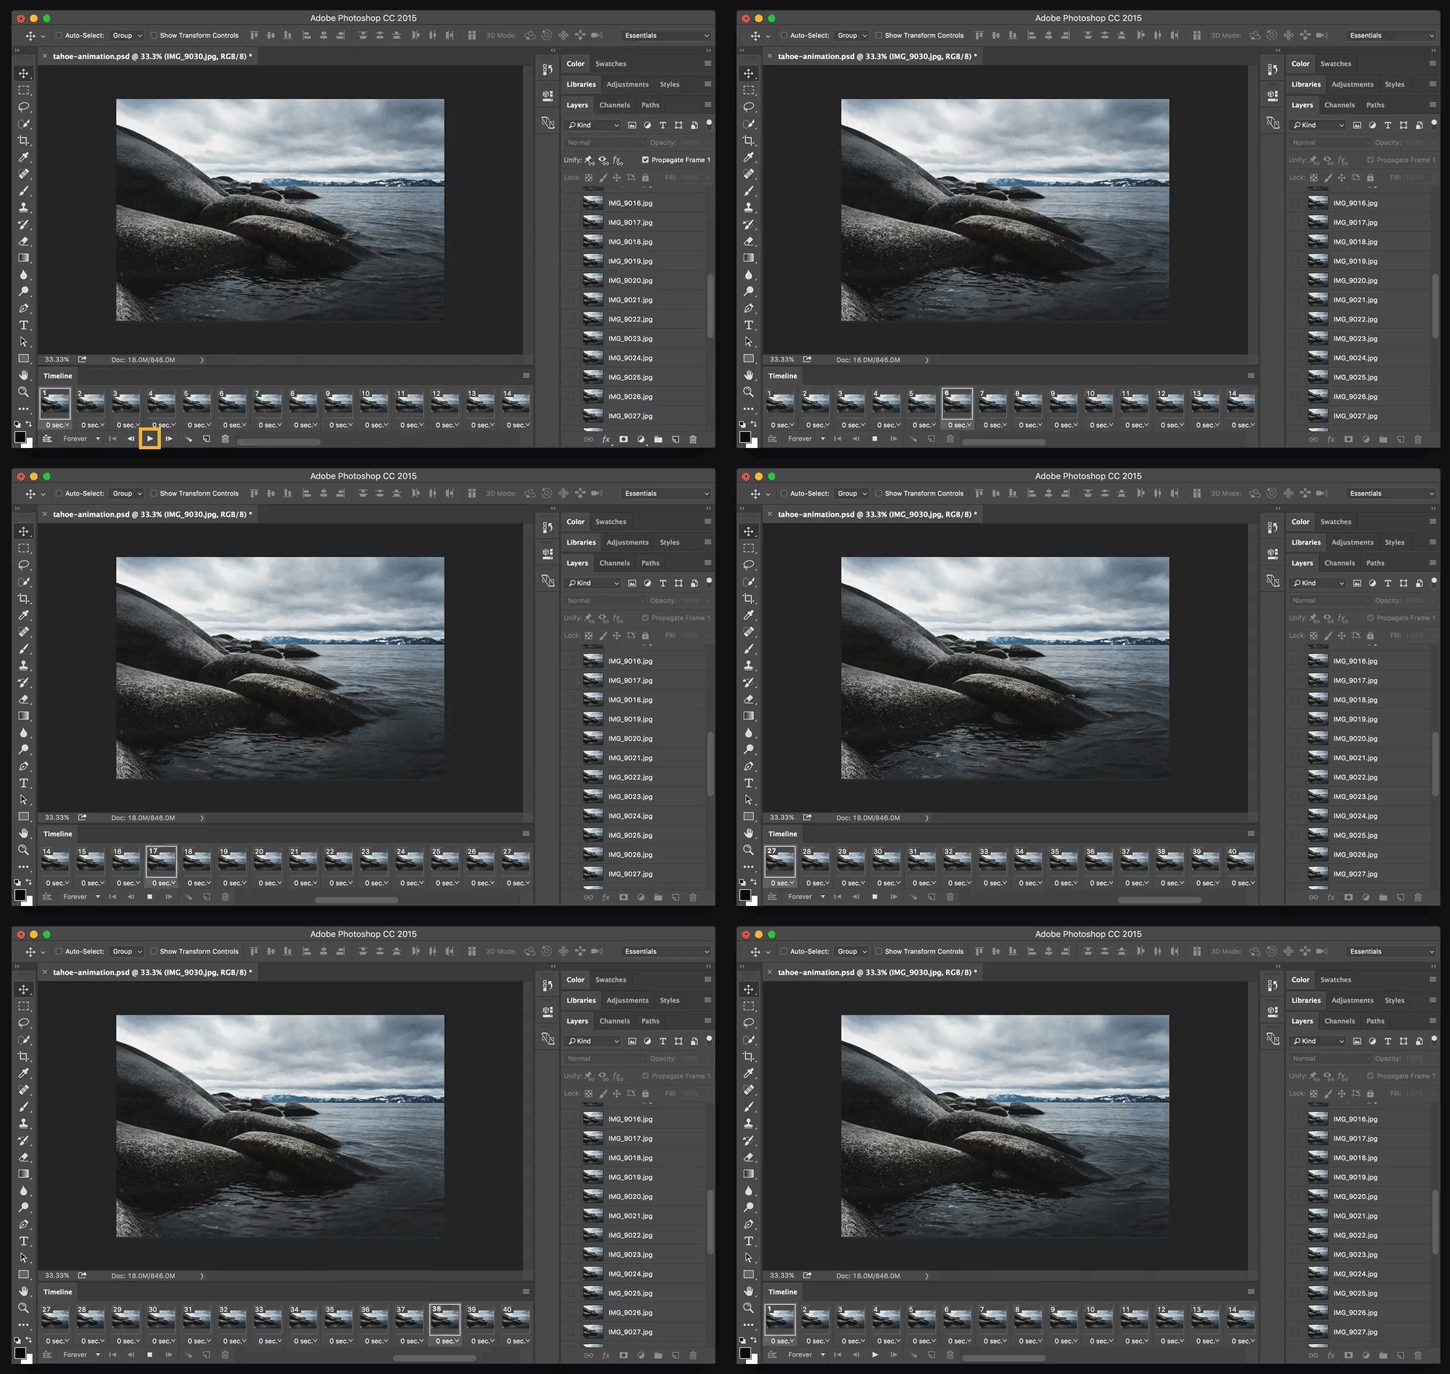
Click the Repeat menu at the bottom of the Timeline panel and select Forever. This will help you create an animation that repeats continuously.

Click the Play button below the Timeline panel (or hold the Spacebar button on your keyboard) to preview the animation.
Step 5. Export the generated animation as a GIF file:
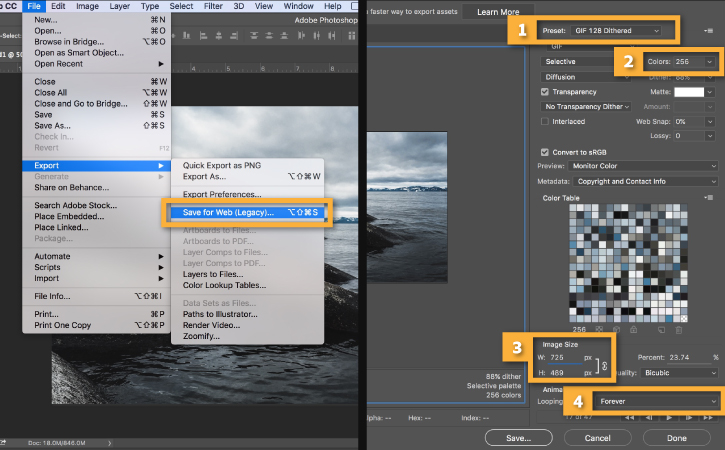
– Go to File > Export > Save for Web (Legacy).
– Select GIF 128 Dithered in the Preset panel.
– Select 256 in the Colors panel.
– If you want to use GIF images online or want to limit the file size of that image, change the Width and Height of the image in the Image Size section.
– Select Forever on the Looping Options panel.
– Click the Preview button in the lower left corner of the Export window to preview the GIF you created in the web browser. Click Save and choose a save location for the GIF file you just finished.
Create Gifs with Giphy
Step 1: You access the giphy.com website and select Create to start creating Gif images.
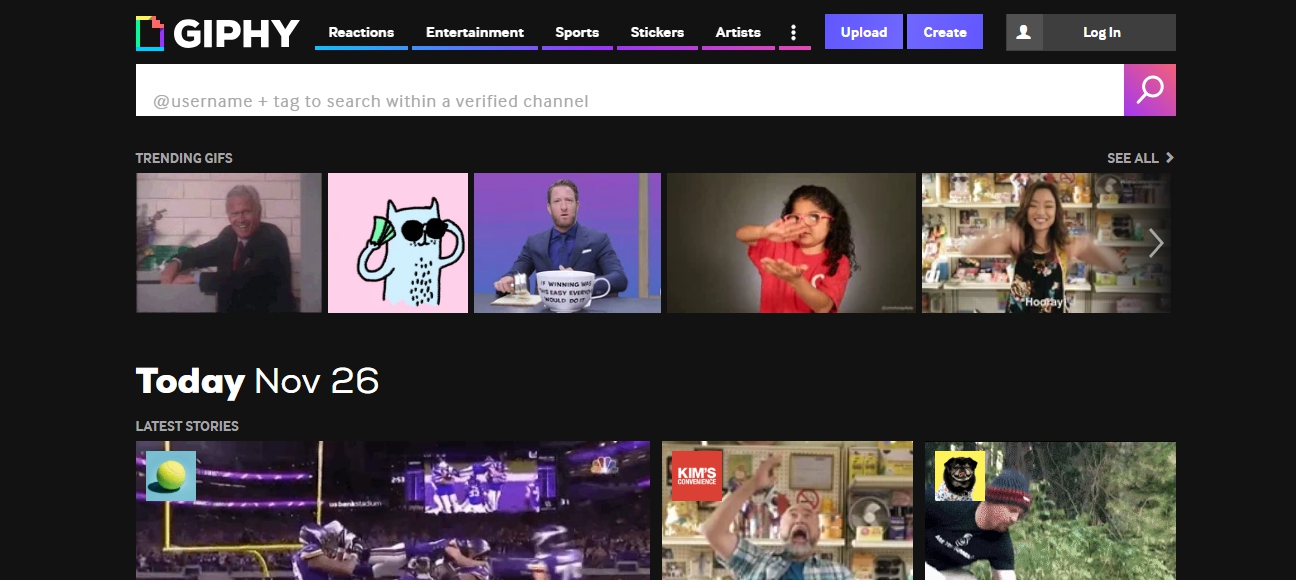
Step 2: Upload the video to the Giphy Web site.
After clicking Create, the menu will appear.
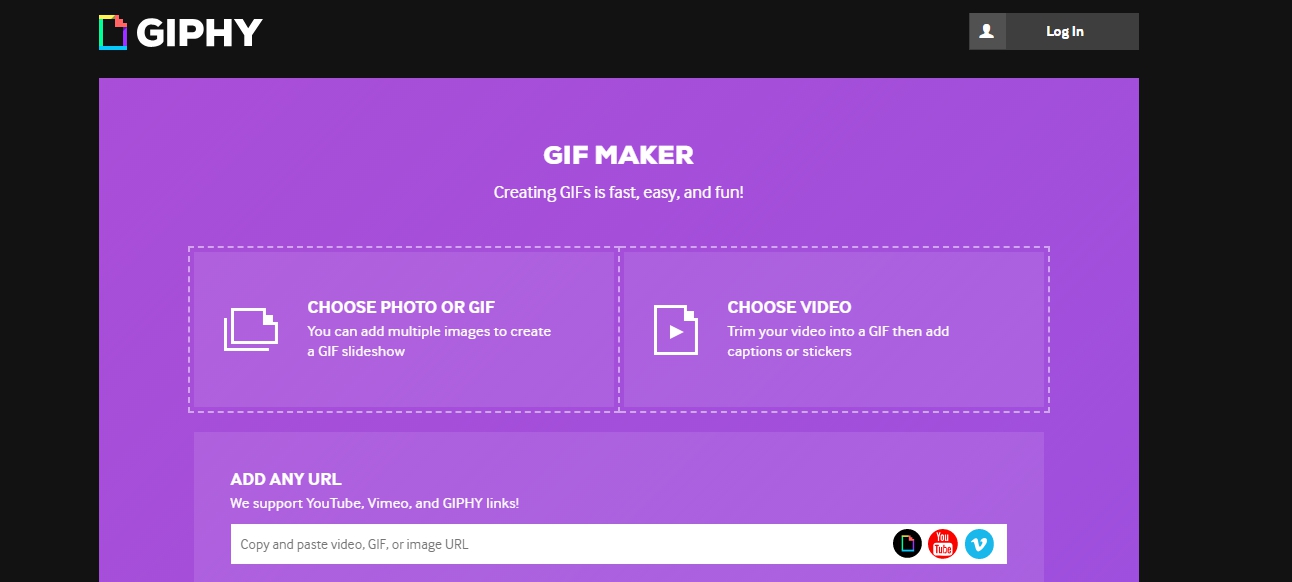
There are 3 ways to upload the video you want to create a Gif to on Giphy’s website:
- Method 1: Click “Choose photo or gif”.
- Method 2: Click “Choose video”.
- Method 3: You copy the image or video link and then click “copy and paste video, gif, or image URL” and paste the link into this box.
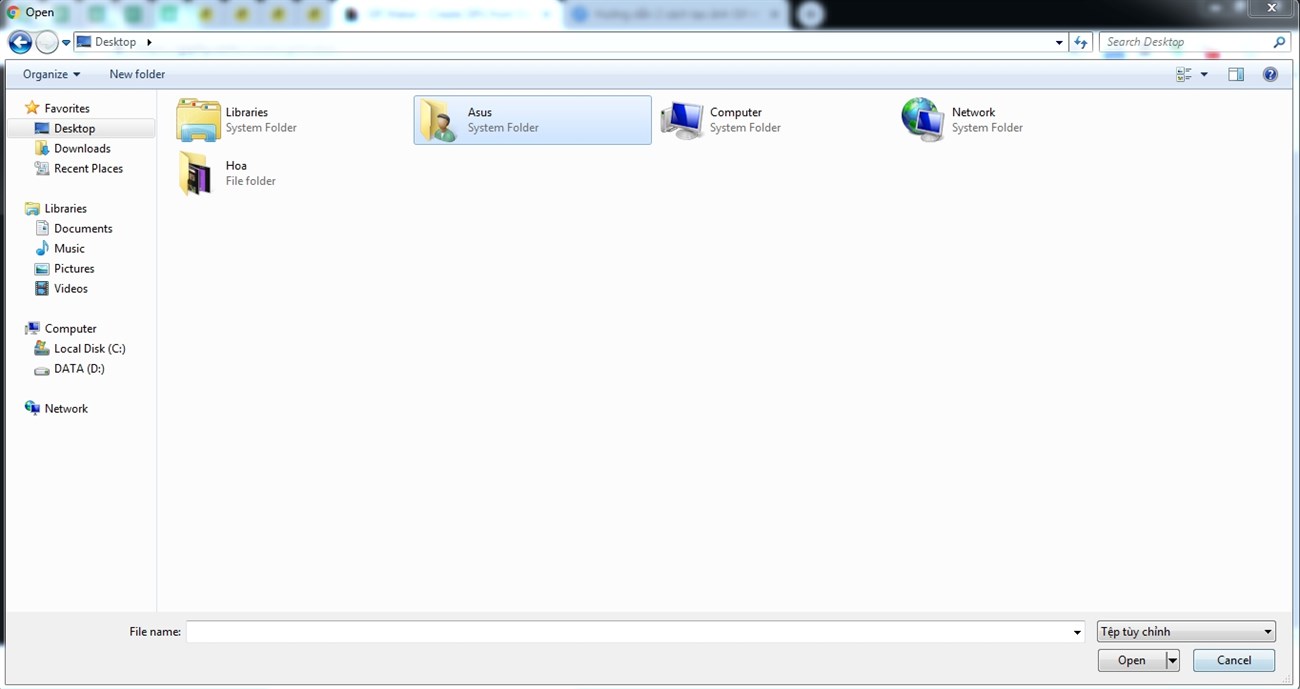
Method 1, 2 you find the video file in the dialog box, and click Open.
After doing one of the above ways, we will have an interface to customize the Gif image.
Step 3: Customize the Gif image.
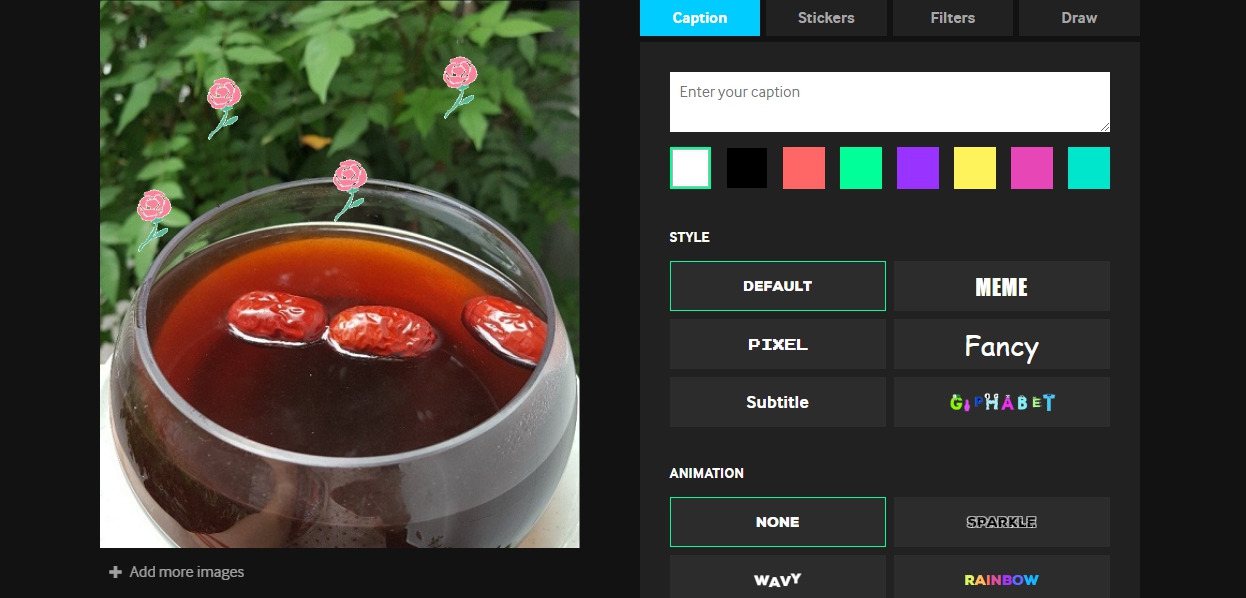
If you want to combine multiple photos, you can choose add more images to choose more photos.
- Start time: The time you want to start running the Gif image.
- Duration: The time it takes for the Gif to repeat.
- Caption: Add text, captions for Gif images.
- Stickers: Add icons, icons for Gif images.
- Filters: Filters for Gif images.
Step 4: Complete the Gif image.
The image creation process will take place quickly or slowly depending on: The length of the time period you select.
Once done, select Upload to Giphy.
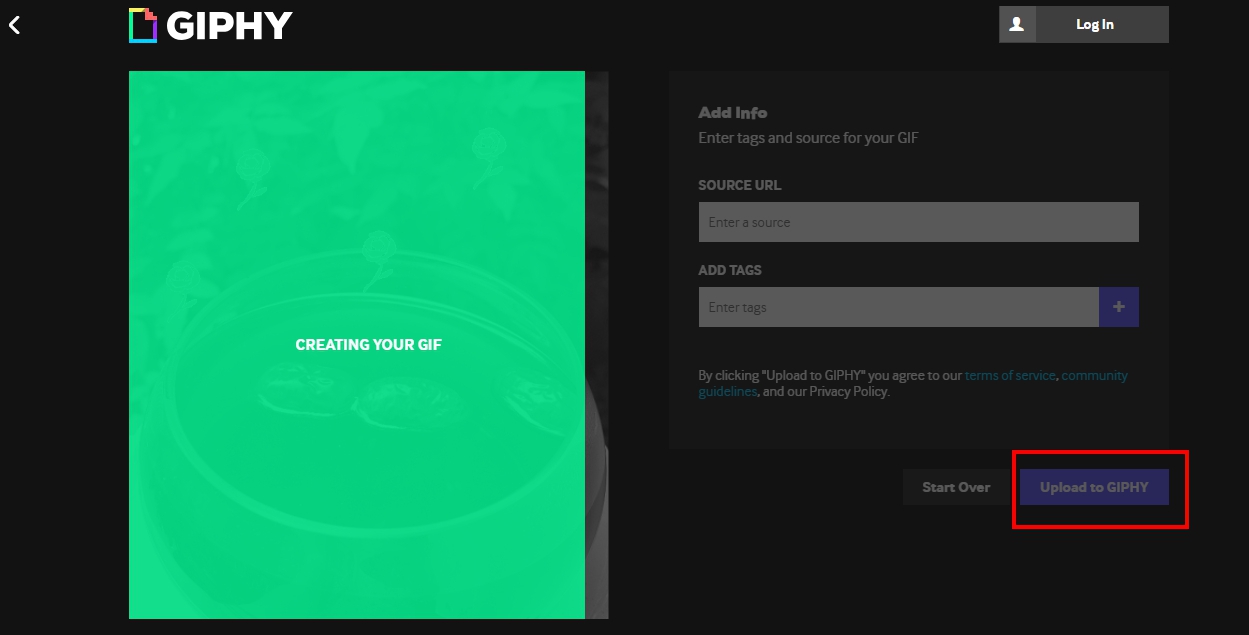
And you click copy link or click share on social networks like Facebook, Instagram, Twitter, …

Above are 2 ways to quickly create Gif images from Photoshop and Giphy. Hope the article is useful to you, good luck.
Thank you for reading this post Instructions for 2 ways to create Gif images on computers and laptops quickly and simply at Lassho.edu.vn You can comment, see more related articles below and hope to help you with interesting information.
Related Search: